가장 간단한 화면이동 Segue에 대해서 배워보겠습니다.

일단 ViewController를 2개 만들어놓습니다.
그리고 첫번째 ViewController에서 Button을 하나 만듭니다.
저 위의 2개 VIewController가 이어져있는데 아래와 같이 하시면 됩니다.

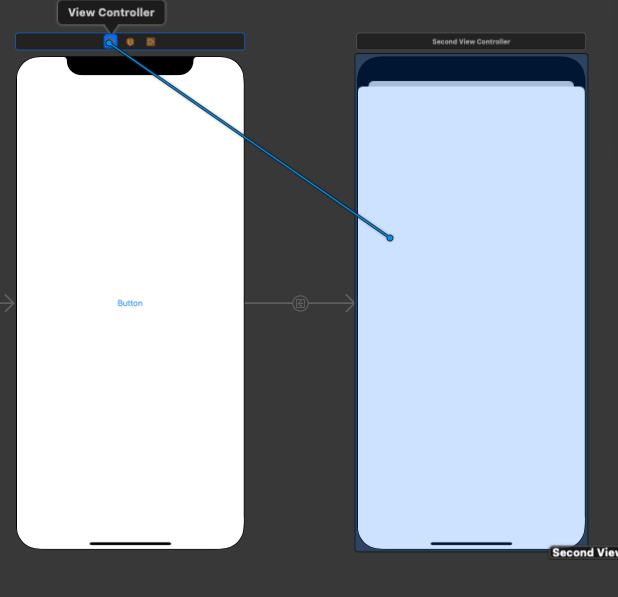
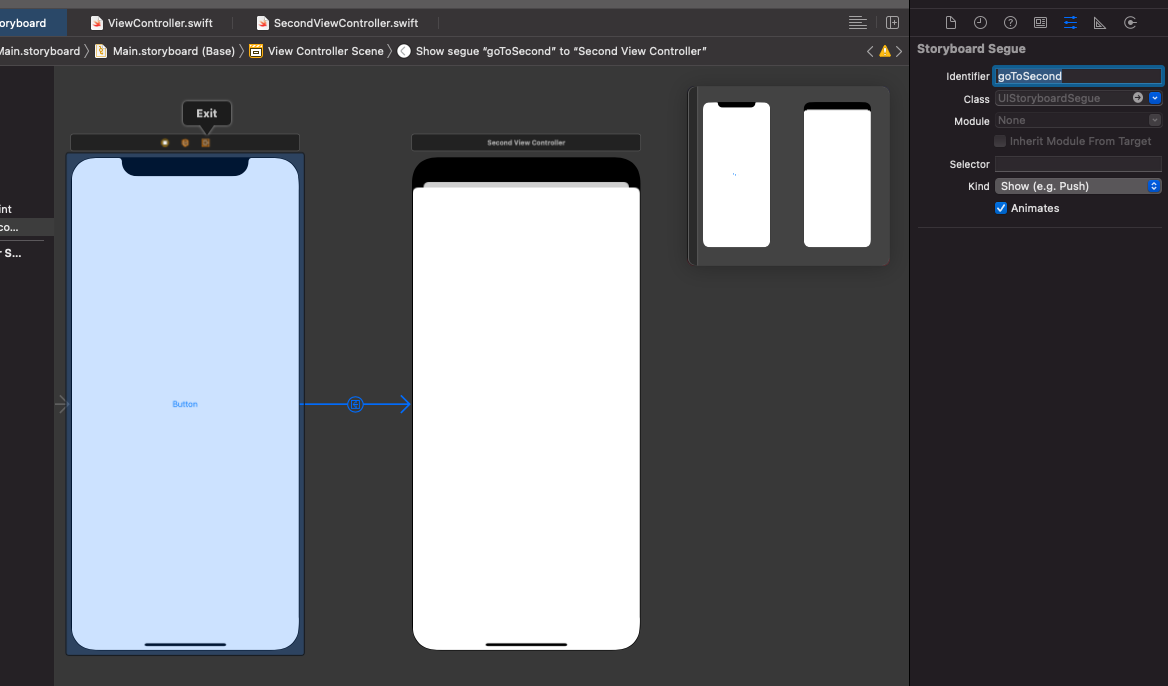
그리고 저 연결선에 이름을 붙여줘야 하는데, 저는 goToSecond라고 붙여줬습니다.

그럼 다음 ViewContoller로 와서, Button을 누르면 performSegue가 실행되도록 하면 됩니다.
This file contains hidden or bidirectional Unicode text that may be interpreted or compiled differently than what appears below. To review, open the file in an editor that reveals hidden Unicode characters.
Learn more about bidirectional Unicode characters
class ViewController: UIViewController { | |
override func viewDidLoad() { | |
super.viewDidLoad() | |
// Do any additional setup after loading the view. | |
} | |
@IBAction func buttonPressed(_ sender: Any) { | |
performSegue(withIdentifier: "goToSecond", sender: sender) | |
} | |
} | |
자 여기까지 하면 기본적인 화면이동은 끝났는데, 데이터 전달을 해줘야 합니다. 그럴 때는 조금 로직이 복잡해지는데
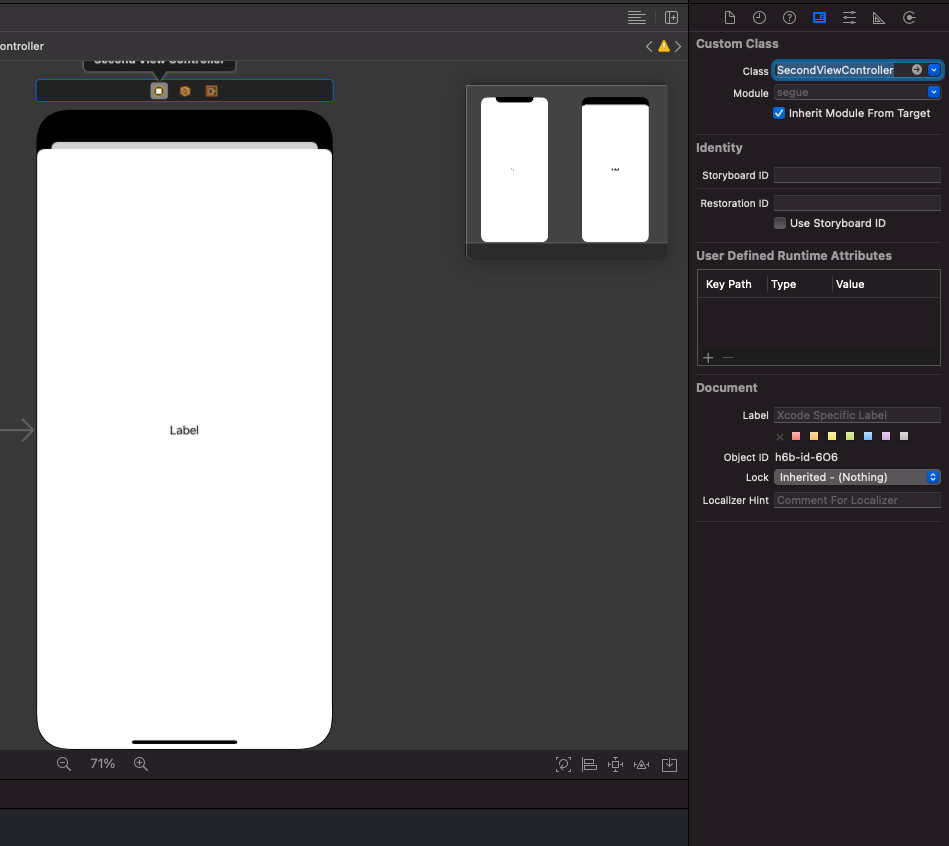
SecondViewController라고 ViewController파일을 하나 더 만들어주고

스토리보드에서 두번째 뷰컨트롤러의 이름을 붙여주고

ViewController에서 prepare를 만들어서 SecondViewController에 있는 secondText라는 변수에 접근해서 data라고 데이터를 전달해줍니다.
This file contains hidden or bidirectional Unicode text that may be interpreted or compiled differently than what appears below. To review, open the file in an editor that reveals hidden Unicode characters.
Learn more about bidirectional Unicode characters
class ViewController: UIViewController { | |
override func viewDidLoad() { | |
super.viewDidLoad() | |
// Do any additional setup after loading the view. | |
} | |
@IBAction func buttonPressed(_ sender: Any) { | |
performSegue(withIdentifier: "goToSecond", sender: sender) | |
} | |
override func prepare(for segue: UIStoryboardSegue, sender: Any?) { | |
if segue.identifier == "goToSecond" { | |
let vc = segue.destination as! SecondViewController | |
vc.secondText = "data" | |
} | |
} | |
} |
이렇게 ViewController를 만들어주고, 아래에 SecondViewController에 코드도 있습니다.
This file contains hidden or bidirectional Unicode text that may be interpreted or compiled differently than what appears below. To review, open the file in an editor that reveals hidden Unicode characters.
Learn more about bidirectional Unicode characters
class SecondViewController: UIViewController { | |
var secondText = "" | |
@IBOutlet weak var secondLabel: UILabel! | |
override func viewDidLoad() { | |
super.viewDidLoad() | |
secondLabel.text = secondText | |
} | |
} |
'IOS(Swift)' 카테고리의 다른 글
IOS Safe Area Remove(Storyboard) (0) | 2020.12.30 |
---|---|
Swift Json Parsing (0) | 2020.12.29 |
IOS Custom Table Cell (0) | 2020.12.29 |
IOS Tableview (0) | 2020.12.28 |
IOS Custom Font 출력 (0) | 2020.12.28 |